Grayscale Images with ImageMagick
| Author: | akeil |
|---|---|
| Date: | 2014-05-10 |
| Version: | 2 |
Converting a photo to a grayscale version is simple enough with the ImageMagick [1] convert command:
$ convert photo.jpg -colorspace Gray out.jpg
However, the result leaves something to be desired. It looks "flat" and boring. Better results can be achieved with this command:
$ convert photo.jpg -type Grayscale out.jpg
If you want more control, use parameters to increase contrast. To make the best use of the available range from pure black to pure white, one can stretch contrast. That means the lightest pixels are converted to white and the darkest pixels to black. The other colors are distributed among the available range.
The -linear-stretch option allows a threshold parameter which defines the number of pixels that are allowed to be converted to pure white an d pure black. A higher threshold means that have a greater range of values to depict the midtones at the expense of details in the highlights and/or shadows.
$ convert photo.jpg -linear-stretch 1x1 -colorspace Rec709Luma out.jpg
Examples
Lock
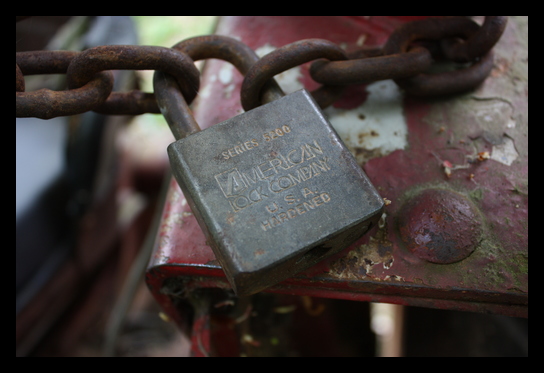
The original photo.

Simple conversion to grayscale colorspace loses most of the detail in the dark areas.
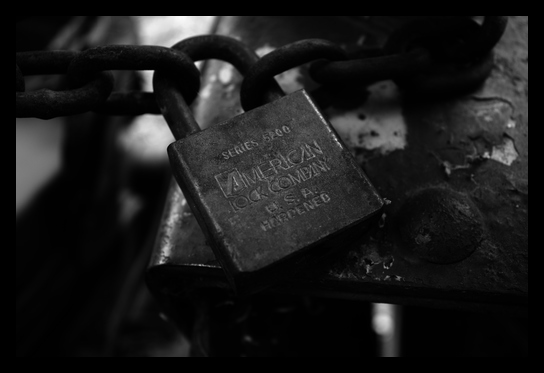
Increasing contrast before conversion makes some of the details and textures stand out more. The effect of pure black and pure white pixels is clearly visible.

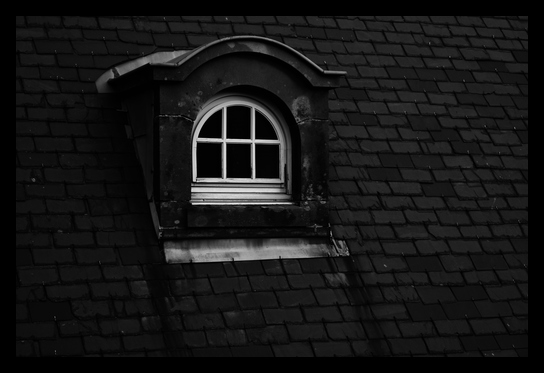
Window
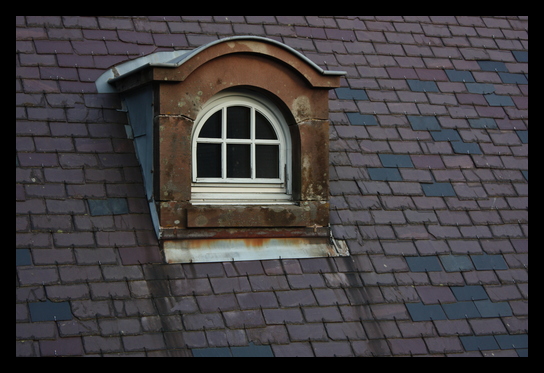
The original photo.
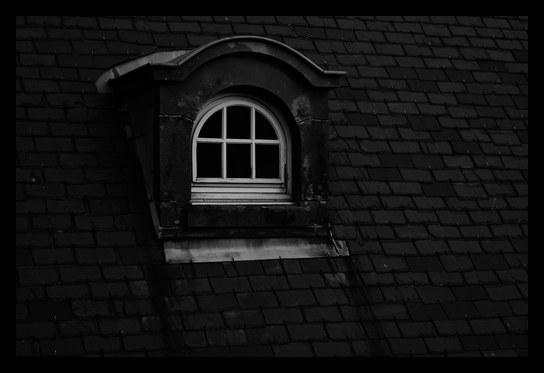
Simple conversion to grayscale colorspace clearly looks less interesting than the color version.

Increase contrast before conversion:
Doors
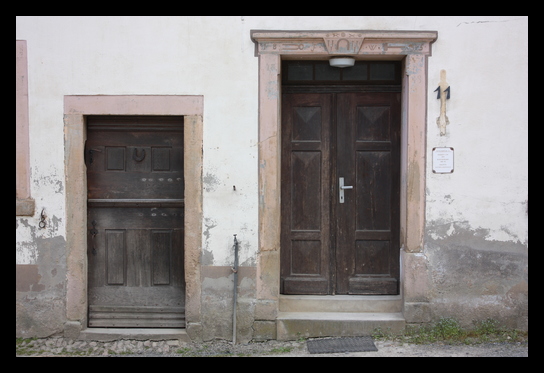
The original photo.

Simple conversion to grayscale colorspace loss of details is visible at the top areas of the doors.

Increase contrast before conversion reveals more details on the doors. The wall looks "whiter".
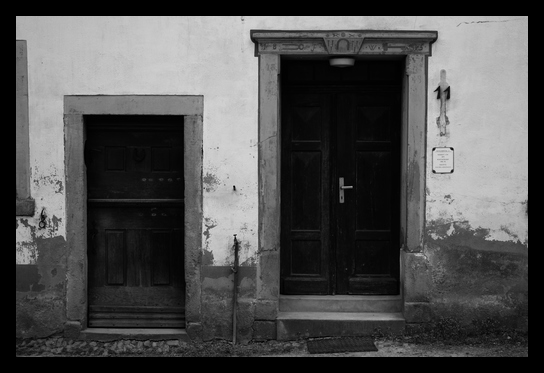
Linear-stretch and non-linear colorspace shows almost no difference to the simpler contrast stretch.
| [1] | http://www.imagemagick.org |